Anúncios
Screen Recording on Any Device: Practical Step-by-Step Guide
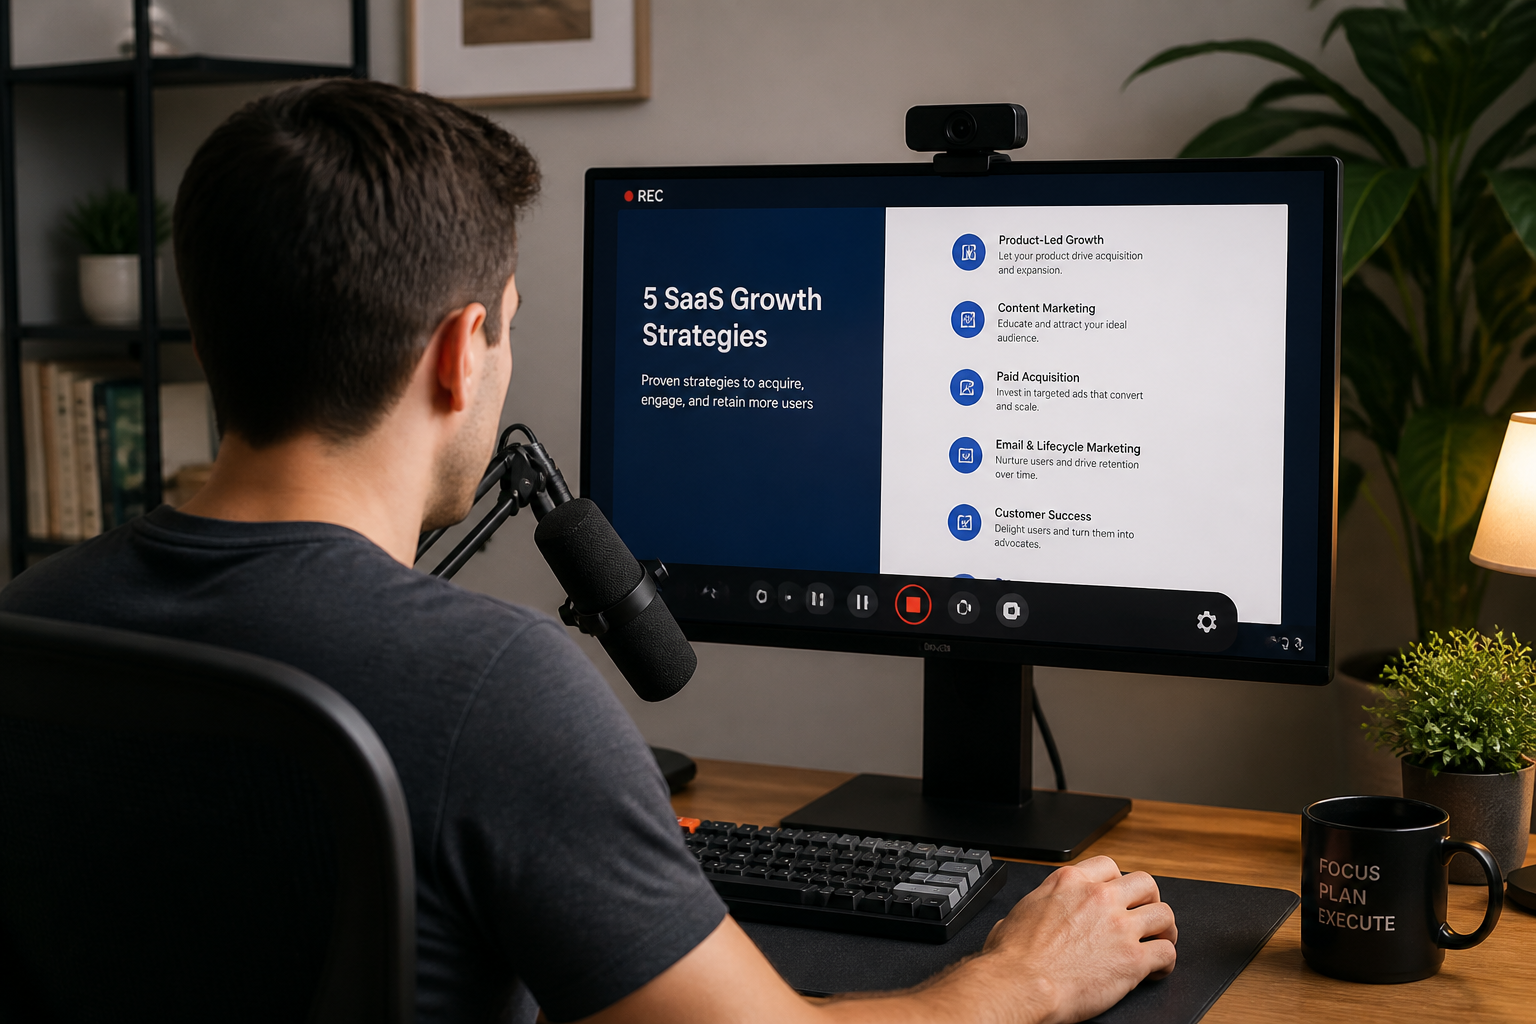
Screen recording is an essential tool for countless tasks—creating tutorials, capturing video calls, or troubleshooting problems. Whether you need to record your computer, tablet, or phone, there’s a method for your needs. This guide walks through the most practical ways to capture your screen using built-in features, popular free apps, and some key tips to avoid common mistakes. No matter your device, you’ll find the right option here, from quick captures to more advanced recording setups.
Built-In Screen Recording: Quick Start on Every Device
Many devices now come with native screen recording features. These built-in tools are usually the easiest way to get started, no extra downloads required. The process and options differ by system, but most let you capture your screen and sound in just a few steps. If you only need basic recording, built-in tools often do the job well. Below, you’ll find a summary of how to access them on Windows, Mac, iPhone, Android, and Chromebooks.
- Windows: Use Xbox Game Bar (Win + G)
- Mac: Use the screen recording shortcut (Shift + Cmd + 5)
- iPhone: Control Center includes a screen recording button
- Android: Recent Android versions offer a recording shortcut in Quick Settings
- Chromebook: Use the built-in screen capture tool with the keyboard (Shift + Ctrl + Show Windows)
While these tools are convenient, they may lack advanced features like selecting bitrate, precise audio control, or live editing. Still, for most quick tasks, built-in recording is fast and reliable.
Screen Recording on Windows: Free and Paid Options
Windows offers multiple ways to record what’s happening on your screen. The built-in Xbox Game Bar is a well-hidden gem for basic video capture, but dedicated apps like OBS Studio and ShareX unlock much more. Here’s how to choose between them and get started.
- Xbox Game Bar: Press Win + G. Click “Capture” then “Start Recording.” Note: It mainly captures apps, not the full desktop.
- OBS Studio: Download and install OBS. Set up a scene, add sources (Screen, Window, Audio), then click “Start Recording.” Great for full desktop and custom setups.
- ShareX: Install ShareX for lightweight screen capture, quick video clips, and sharing options. Useful when you want more control without the complexity of OBS.
If you need to capture system audio or multiple windows, consider OBS. For smaller files and annotated screenshots alongside video, try ShareX. Game Bar is simplest, but more limited.
Screen Recording on Mac: What Works Best
Mac users have built-in recording functionality that covers most needs, plus several reliable third-party apps if you want additional features. Let’s break down your best options.
- Built-In Tool: Press Shift + Cmd + 5. Use onscreen controls to record your full screen, a window, or a selection. Options let you record your microphone audio.
- QuickTime Player: Open QuickTime Player, choose “New Screen Recording.” Select options for microphone and quality. Good for simple, high-quality videos.
- OBS Studio: For multi-source recording, overlays, and complex layouts, install OBS. It’s favored by streamers and professional presenters.
Built-in options are easy to use and stable. Advanced users may prefer OBS for its flexible setup, although QuickTime often suffices for lectures, demos, or bug reports.
Recording Your iPhone Screen: Step-by-Step
Capturing your iPhone or iPad’s screen is straightforward thanks to iOS’s built-in tool. It’s ideal for walkthroughs, app testing, and sharing gameplay. Here’s how to use it and what to expect.
- Swipe down from the top right (or up from the bottom, for older models) to open Control Center.
- Tap the Screen Recording button (a solid circle inside a ring). There’s a three-second countdown.
- To record audio, long-press the icon and enable microphone input before starting.
- When you’re done, tap the red status bar or return to Control Center and stop the recording.
Your recordings save directly to Photos. Some apps, especially media players and secure screens, may block recording or display a black screen. Adjust permissions as necessary before capturing.
Android Screen Recording: Native and App-Based Tools
Most Android phones made in the last few years include a built-in screen recorder. For older devices or extended features, several trusted apps are available on Google Play.
- Swipe down to open Quick Settings. Find and tap “Screen Record”.
- Choose whether to record audio, show touches, or enable front camera overlay.
- Tap “Start” and wait for the countdown. When finished, tap the floating stop button.
Manufacturers like Samsung, OnePlus, and Google name features slightly differently. Look for “Screen Recorder” or similar. If your device lacks this, AZ Screen Recorder and Mobizen are well-rated options that offer watermark-free recording and additional controls.
- AZ Screen Recorder: Intuitive interface, no time limit, basic editing in-app.
- Mobizen: Good for longer videos, optional camera overlay for reaction shots.
Always check app permissions and privacy settings, especially for apps from third-party sources.
Chromebook Screen Recording: Fast and Integrated
Chromebooks feature a native screen recording tool built into Chrome OS. It’s sufficient for recording lessons, walkthroughs, and short how-to videos, with minimal setup.
- Press Shift + Ctrl + Show Windows (the rectangle with lines key).
- Choose either “Screen record” or “Screenshot.”
- Select your screen, window, or partial area. Enable microphone audio if needed.
- When done, click the red stop icon on the Shelf (bottom right).
Videos save in your “Downloads” folder by default. Chrome OS also supports basic annotation and, on some models, stylus tools. For editing, you’ll usually need to use web apps or transfer the video elsewhere.
Popular Third-Party Screen Recording Apps Compared
If your built-in tool feels too limited, free apps like OBS Studio and ShareX offer powerful alternatives. Paid software like Camtasia adds editing, but open-source picks handle most needs. Here’s a practical comparison of major options.
| App | Platforms | Best For | Main Limitations |
|---|---|---|---|
| OBS Studio | Windows, Mac, Linux | Multi-source recording, streaming | Complex setup for beginners |
| ShareX | Windows | Quick screen capture, automation | Limited editing features |
| Camtasia | Windows, Mac | Pro video editing, effects | Costly, heavy installation |
| AZ Screen Recorder | Android | Mobile recording | Ads in free version |
| QuickTime | Mac | Simple, reliable capture | Limited export formats |
If you need multiple video sources, overlays, or to stream live (e.g., for presentations, lectures, or gaming), OBS leads. For quick desktop or browser captures and sharing, ShareX is ideal. If your focus is mobile recording, native tools are usually best.
Capturing Audio: Microphone and System Sound
Audio is often as important as the video, but capturing the right sound can be challenging. Many built-in recorders only grab microphone input, not what you hear from speakers. Here’s how to approach audio capture for best results.
- Microphone audio: Almost all recorders let you add a narration track. Make sure your mic is selected as the input source.
- System sound (desktop audio): Windows users can capture this with OBS Studio or sometimes with third-party drivers. Mac’s built-in capture doesn’t allow “what you hear,” but apps like BlackHole let QuickTime and OBS record system sound.
- Mixing sources: Want your narration and computer audio? Set multiple sources in OBS or record separately and mix in editing.
Always perform a soundcheck before a long recording—do a test clip and make sure levels are clear and balanced. Turn off noisy apps or notifications before recording to reduce distractions.
Avoiding Common Screen Recording Pitfalls
Many screen recordings fall short due to preventable mistakes. Here are some frequent issues and how to sidestep them.
- Recording the wrong screen or window: Double-check which display or app you’ve selected, especially with multiple monitors.
- No audio or poor sound: Confirm your mic or system audio is enabled and picked up by your recorder. Place your mic away from keyboard or fan noise.
- Notifications popping up: Set your device to “Do Not Disturb” or mute incoming notifications before starting.
- Low resolution or frame rate: Use the highest possible settings allowed by your hardware. Low settings make text hard to read.
- Running out of storage: Long recordings create large files. Check available disk or cloud space before starting.
Practicing a short run-through before your main recording helps identify issues early.
Editing and Sharing Your Screen Recordings
After recording, you might want to trim errors, blur sensitive info, add text, or merge clips. Several free and affordable tools can help polish your video whether you’re on desktop or mobile.
- Windows: Use Clipchamp (built-in), Shotcut, or DaVinci Resolve for editing.
- Mac: Try iMovie, QuickTime Player (for trimming), or CapCut for more effects.
- iPhone/Android: Use built-in gallery editors, CapCut, or InShot to trim and annotate videos.
For sharing, cloud services like Google Drive, Dropbox, or OneDrive are ideal. If files are too large, try re-encoding them with HandBrake or exporting at a lower bitrate. Remember to respect privacy—blur or cut out sensitive information.
Choosing the Right Method: Criteria and Examples
With so many options, the best screen recording method depends on your needs. Here are some simple criteria and examples to help you decide.
| Use Case | Best Tool | Why |
|---|---|---|
| Quick tutorial for a colleague | Built-in recorder | No install, quick start, easy sharing |
| Recording gameplay or live presentations | OBS Studio | Multiple sources, overlays, live audio mix |
| Capturing error for tech support | ShareX or macOS snapshot | Crisp short clips or annotated screenshots |
| Creating pro training videos | Camtasia or editing after recording | Editing features, effects, clear export |
| Mobile app demonstration | iOS/Android built-in tool | Direct save, instant upload, includes system gestures |
| Low-resource environment | ShareX or Chromebook tool | Minimal CPU usage and file size |
Before recording, clarify your purpose. For a quick bug report, native tools win for speed. For a video course, invest time in setup and editing—it pays off in the final result.
Tips for Smooth, Clear Recordings
Even basic screen recordings can stand out with a few best practices. Follow these pointers for crisp, professional results on any device.
- Close unused apps—this frees memory and avoids embarrassing pop-ups.
- Clean your desktop or background to reduce distractions.
- Test your audio and mic position before starting.
- Select the area or window you want to capture, not your whole display if unnecessary.
- Keep recordings concise—short videos are easier to watch and edit.
- Edit out mistakes or long pauses before sharing.
- For longer guides, break content into chapters or separate files.
A little planning makes your video much clearer and more comfortable for your audience to follow.
Advanced Features: Overlays, Annotations, and More
If you want to do more than just capture your screen, advanced features like overlays, webcam windows, and annotations add a lot of value. OBS Studio and some paid apps make it easy to layer video feeds, graphical elements, or text directly onto your recording.
- Picture-in-picture: Put your webcam feed in a corner for tutorials or reactions.
- On-screen annotations: Use drawing tools or highlight zones to focus attention.
- Hotkeys and automation: Set up shortcuts to start, pause, or mark key points live.
These enhancements can make how-to guides, presentations, and training content much more engaging. However, they usually require a little more setup and experimentation, especially in OBS.
Future-Proofing Your Recording Workflow
As devices and operating systems evolve, built-in and third-party tools are updated regularly. Keeping informed about new features (like higher resolutions, direct editing, or privacy updates) helps maintain an effective workflow. If your work depends on screen recording, set aside time every few months to test the latest tools or settings, and back up your config files.
Also, as privacy concerns grow, make sure you avoid unintentionally recording sensitive data. Get consent if recording calls or meetings, and check organization policies before capturing company systems. Staying organized with your recordings and regularly clearing out old files can keep your storage manageable and your workflow smooth.
When in doubt, err on the side of caution: don’t record or share screen captures that could compromise another person’s privacy, propriety content, or confidential data. Transparency and consent contribute to a respectful digital environment.
Even if legal, it’s best practice to consider the ethics of screen recording. Ask yourself: are you respecting privacy and intellectual property? Are you using recordings for legitimate, disclosed purposes? These questions help prevent misunderstandings and foster trust in both professional and educational environments.
If you’re planning to record a video call, online class, or any session where others are present, announce your intent to record at the start and obtain clear permission. Some platforms even include a notice or consent prompt when recording starts—take advantage of these features whenever possible to maintain transparency.
It’s essential to understand the legal and ethical boundaries of screen recording, particularly when other people’s information or voices are involved. Laws regarding consent differ by country and region. In some places, recording video or audio without consent is illegal—even in the context of a meeting or classroom session. Always research the laws in your jurisdiction before recording conversations, webinars, or meetings.
Legal and Ethical Factors in Screen Recording
| Tool | Cloud Export | Direct Video Upload | Collaboration Integration |
|---|---|---|---|
| OBS Studio | No (manual upload) | YouTube, Twitch | Limited (via file sharing) |
| Loom | Loom Cloud, Google Drive | YouTube | Slack, Teams |
| Camtasia | Google Drive, Dropbox | YouTube, Vimeo | Limited |
| Windows Game Bar | No (local only) | No | No |
| QuickTime | No (local only) | No | No |
Consider this table comparing integration options offered by popular screen recording tools:
For those managing large volumes of recordings—such as educators, support staff, or content creators—using automation tools can streamline repetitive tasks. Connecting your screen recording app to automation services (like Zapier or IFTTT) opens the door to instantly organize, rename, and sort files, or even trigger workflows based on recording completion.
If you’re using a cloud-based platform such as Google Drive, Dropbox, or OneDrive, look for export or auto-upload features in your recorder to send videos directly to these services. This is especially helpful if you need to access the files from multiple locations or collaborate with peers. Some tools also support direct integration with video platforms (like YouTube or Vimeo), content management systems, or even messaging platforms like Slack or Microsoft Teams, letting you instantly share captured content with a specific audience.
Screen recordings are rarely an end in themselves—they’re often part of a broader project or workflow. Connecting your captures to other tools can save time and improve productivity. Most built-in and third-party recorders make it simple to export files, but the integration process can vary depending on your setup and requirements.
Integrating Screen Recordings with Other Tools and Workflows
- Sign out of messaging platforms or switch them to “Do Not Disturb” mode.
- Close documents, tabs, or files unrelated to your recording purpose.
- Disable screen notifications, including email, system alerts, and chat bubbles.
- Choose partial screen or window capture options, if possible.
- Double-check recorded footage before sharing it outside your organization or with the public.
Here’s a practical checklist to help ensure your screen recordings respect privacy and security:
Many modern screen recording tools offer privacy features like area selection (recording only a region of your screen), blurring, or censoring portions of the video. Use these features to ensure you don’t unintentionally share information you’d rather keep private. Remember also that recordings can include metadata or even embedded location data, especially when created on mobile devices.
Recording your screen can inadvertently capture sensitive information, such as private conversations, passwords, or confidential documents. Before you start any recording, take a moment to tidy your workspace and close windows or apps that shouldn’t appear in your video. Turn off notifications to prevent pop-ups from interrupting your recording or exposing private data.
Privacy and Security Considerations During Screen Recording
If your recording tool allows format selection, consider where and how you’ll use your video. For most users, MP4 will be the best default. However, for work with professional editors, MOV may be the format of choice. Always double-check your platform’s compatibility and required quality before starting a lengthy recording.
MP4 is favored for its balance of good quality and efficient compression, making files small enough for email and easy to upload to platforms like YouTube. MOV files, more common in Apple environments, offer higher quality at the cost of larger file sizes, which is ideal if you’re editing extensively or need maximum clarity. AVI and WEBM are less common but can offer advantages in particular use cases, such as lossless quality (AVI) or web-focused workflows (WEBM).
The file format you choose for your screen recordings can affect both quality and compatibility. The most common formats you’ll encounter are MP4, MOV, AVI, and sometimes WEBM, each with its own strengths. While most built-in screen recorders default to widely accepted formats, knowing the difference can help you streamline your editing and sharing process.
Understanding Screen Recording File Formats
Keeping your recording library tidy saves time and prevents accidental overwrites. A bit of organization after each recording session can make a big difference as your collection grows.
- Set up dedicated folders: Group recordings by project, date, or topic.
- Name files descriptively: Include key info such as content, date, or version (e.g., “ProductDemo_June2024_v2.mp4”).
- Delete unwanted takes: Keep only successful recordings to save space.
- Back up important files: Use cloud storage, external drives, or both for crucial material.
Develop a simple system for storing and naming your files. Using folders, clear file names, and occasional backups helps avoid clutter or accidental loss of important videos.
Once you’ve created several screen recordings, keeping your files organized is essential. This makes it easier to locate, review, or edit past videos—especially if you make recordings regularly for work, tutorials, or documentation.
Managing and Organizing Your Screen Recordings
When possible, choose a format that’s both easy to share and edit. For most users, sticking with MP4 is the most flexible option unless your workflow or audience requires something different.
| Format | Compatibility | File Size | Editing Ease |
|---|---|---|---|
| MP4 | Excellent (universal) | Small | High |
| MOV | Best on Apple devices | Medium | High |
| AVI | Wide (especially Windows) | Large | Medium |
| WebM | Browsers, web platforms | Small | Medium |
It’s practical to know the strengths and weaknesses of each format, especially if you plan to edit or share your recordings. Consider where you’ll be uploading or sending your video, and whether the recipient or platform has format restrictions.
The format your screen recording is saved in affects compatibility, file size, and quality. Common formats include MP4, MOV, AVI, and WebM. Most built-in screen recorders default to MP4 due to its wide compatibility and balance of quality and compression. However, some devices and third-party tools may offer different format options.
Understanding Screen Recording File Formats
Editorial note: This guide is updated regularly for clarity, accuracy, and new device features.